Wednesday, 17 July 2019

Principles of Engelmann's Direct Instruction: Cognitive Load

This post is part of a series where I go in to detail on some of the main aspects of Direct Instruction as laid out by Siegfried Engelmann in this book.

Below are links to the other posts in this series. Scroll past them to read the article.


Cognitive Load Theory

The basic idea of Cognitive Load Theory is that everyone has an inherent limit to how much information can be stored in your working memory at one time, therefore students will struggle to grasp concepts when their working memories are overloaded with data.
Though Direct Instruction does not reference Cognitive Load Theory directly, it still has a lot to say about ways to reduce the cognitive load for students, particularly during initial instruction.

Reduce clutter

Remove all elements of a problem that are non-essential to the skill, allowing students to infer what is essential/non-essential to the concept. This means changing this question:
Abby, Charles and David share out 32 sweets in the ratio 2:5:9. How many more sweets does David get than Charles?
in to this question:
Share 32 in the ratio 2:5:9
This also means removing non-essential elements from diagrams and avoiding the use of 'real-life' pictures or situations (more on this in the "real-world" maths section)

The wording/setup principle

Every example and practice problem that students do during the initial instruction should have the exact same setup, right down to the wording and the font of each question. In practice, along with the "single dimension transformations" discussed below, this looks a lot like Craig Barton's Variation Theory problems:

Single dimension transformations

As seen in the problem set above, only a single aspect of the question changes from problem to problem. This reduces cognitive load as there is a single aspect to concentrate on between questions. Craig Barton points to other benefits:
By holding constant as much as possible and varying one element, we can direct students’ attention to that element that has varied. Any change (or lack of) in the answer may then be attributed to the change in the element. Moreover, because each question or example is related to the one that preceded it, students are able to form expectations as to what the answer will be. I call this process reflect, expect, check. This can lead to significant moments of revelation and discussion when these expectations are not realised, compelling students to think more deeply about the processes involved, instead of just cruising through an exercise on autopilot.

Atomisation 

Discussed in more detail here, atomisation, or the splitting of skills down to their component parts, also means that students are learning a single concept at a time. This means there is less information that needs to be stored in their working memory at any one moment.

Addressing concerns

  • Students won't be able to generalise to similar questions which are worded differently.
    • This is taught as a separate skill during expansion activities
  • Students won't be able to repeat the process when a questions is not preceded by several highly similar questions
    • This is also taught separately during review and context shaping activities.
  • So no context? No treasure hunts, code-breakers, funny pictures practical demos or anything?! Won't students find maths incredibly boring?
    • Most models for motivation put a high emphasis on 'perceived ability to succeed' as a main contributor to overall motivation. Atomisation is a fantastic tool for facilitating regular and obvious successful progress. I have found my students have enjoyed my lessons much more this year because they can 'feel' the progress they are making.
    • All of those activities are possible to fit in to a Direct Instruction program, and should only be strictly avoided during the initial instruction phase. Because each component is small, each initial instruction phase should only take a few minutes. This frees up time to do the code breaker/treasure hunt as an expansion or review activity in a future lesson.

In the Direct Instruction model, the aim of initial instruction is to teach the central concept only,  whilst avoid the learning of misrules. Separating the concept, question identification and recall and teaching them as separate skills is a further tool for reducing cognitive load.

Monday, 15 July 2019

Principles of Engelmann's Direct Instruction: Expansion and Context-Shaping

This post is part of a series where I go in to detail on some of the main aspects of Direct Instruction as laid out by Siegfried Engelmann in this book.

Below are links to the other posts in this series. Scroll past them to read the article.


Expansion:

Expansion takes place after initial teaching, where things have been simplified to the only the essential features (see cognitive load). Expansion then introduces more variety, showing how questions can be worded differently and still mean the same operation

One type of expansion activity would be 'implied conclusion' tasks. These are tasks that you use the current skill (possibly alongside other skills which are already firm) to solve new problems. An example of this is ordering fractions after being taught how to compare fractions.

Matching ("circle all the fractions greater than two thirds") and "here is the answer, make up the question") are other types of expansion activities.


Context Shaping

Context shaping is the name given in Direct Instruction for demonstrating the range of contexts where a skill can be used.

This may be covered in a single activity or multiple activities, depending on the number of different possible contexts and the amount of difficulty added with each new context.

DI recommends juxtaposing highly different contexts one after the other (before interleaved practice). This maximises the chances that students will interpolate and infer any contexts in between those shown.

Both expansion and context shaping activities should happen as soon as possible after students are firm on the initial teaching. This is so that students do not stipulate by viewing the skill in too narrow a way.

Example:

These questions from https://www.map.mathshell.org show a variety of contexts for using direct proportional reasoning:
*Note, there is also some question discrimination here as students need to decide if the numbers are in direct proportion or not.

I would likely split this in to several activities in order to reduce the difficulty of individual sessions. In order to juxtapose highly different contexts I might show them in this order (though other orders would also work):

  • Speed/cycling and driving
  • Lines
  • Similar shapes/triangles
  • Maps
  • Money and Petrol

Reflections

Textbooks generally do this in their exercises. However, I find the structure that DI gives to these activities helpful for phasing in the wider activities. So for a high ability set, I may just give them the textbook and let them get on with it and, for a low ability set, I can expand their understanding in small stages over several days. This allows students of all abilities to feel successful and to deepen their understanding of a topic, something I definitely struggled to get right in the past!


Friday, 12 July 2019

Principles of Engelmann's Direct Instruction: Overtisation

This post is part of a series where I go in to detail on some of the main aspects of Direct Instruction as laid out by Siegfried Engelmann in this book.

Below are links to the other posts in this series. Scroll past them to read the article.


Overtisation:

Overtisation means giving a visible outcome to every cognitive decision students need to make. This goes further than the standard steps students are usually asked to write to "show their working". These visible outcomes could be oral, written or physical but they must be 'assessable' in that they show you whether a student is understanding that step. There are two reasons to do this:
  • Students get a visual or physical hook to remind themselves of what they need to do next. This allows students to get a 'feel' for when they are doing the right steps (much like you do when learning a physical skill like throwing).
  • The teacher gets clear indications of exactly when and where students are making mistakes.

Fading:

After the steps have been embedded in to a cognitive routine and the cognitive routine has been developed to a good level of understanding, you allow the students to 'covertise' these steps. This means they start to show less and less working to the point of minimal model answers. This is necessary to keep the pace up for later practice/assessment.

Example:

Before answering  , students:

  • first read out the question (to assess understanding of the symbols for multiplied fractions) 
  • write:   to show what operations they will perform.
Once embedded, students would remove these steps and go straight to an answer.


It is worth noting that Engelmann often goes way further than this, having 10 whole steps to complete when 7 + 3 is the question!

Unanswered Questions:

Here are a few reflections I have had about covertisation that I still do not have the answer to:
  • How far do you go? 10 steps for single-digit addition seems like overkill, but maybe wouldn't be for some classes. My guess is that this comes down to teacher judgement.
  • When do you covertise? Engelmann goes in to some detail, but it is not clear to me how I judge this for a whole class. Again, at the moment I am using my personal judgement.
  • There is a trade-off between overtisation and speed of practice: the more steps you take, the longer you spend on each question. This surely needs to be considered when thinking about doing it.

By the way, you may be thinking "what about unassessable skills, like critical thinking and decision making? Does DI fall short of teaching these things?" I will be addressing this in the instruction for problem solving techniques section.

Wednesday, 10 July 2019

Principles of Engelmann's Direct Instruction: Atomisation

This post is part of a series where I go in to detail on some of the main aspects of Direct Instruction as laid out by Siegfried Engelmann in this book.

Below are links to the other posts in this series. Scroll past them to read the article.


    Atomisation


    Atomisation, to me, is the part of Direct Instruction that I found both the easiest to implement and the most impactful in terms of student outcomes. It is the splitting up of a skill or topic in to its indivisible component pieces of knowledge. It is important that these components each have a overt, assessable outcome (more on this in overtisation).

    Each component skill can then be categorised and taught separately before being put together to learn the target skill or topic. There are several advantages to doing this:
    1. It reduces cognitive load as students only have to concentrate on one aspect at a time.
    2. It is easier to correct mistakes as there is only one component for students to misunderstand.
    3. With a narrower focus to the topic, students can explore the full range of this component quickly. This means that they are more likely to get a deep understanding of the component.
    4. It allows for a high percentage of student successes, building confidence in their abilities.
    5. It gives you, as a teacher, a better understanding of how difficult a topic will be for students.
    6. It helps to avoid stipulation, the learning of misrules about a topic.
    7. It makes behaviour management easier.

    Example:

    Let's take a look at right-angled trigonometry:

    In the past, I would probably still have done some splitting up of this topic in to smaller parts. Perhaps by working on missing angles before missing sides, or by looking at only sin before cos and tan. However, I don't think I really understood how complicated trigonometry can be until I atomised it. This is how I would split up the components of basic trig:

    • Deciding when trigonometry can/should be used
    • Deciding which equation to use
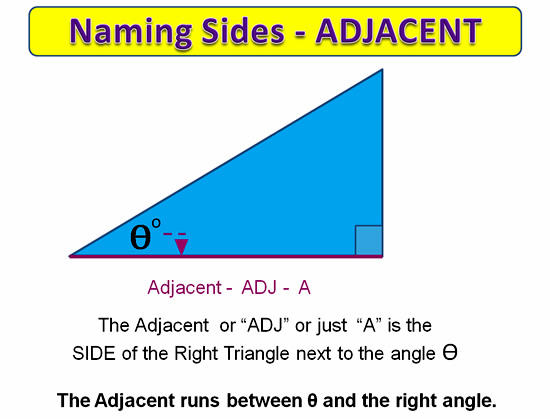
      • Labelling the sides of triangles as opp, adj, hyp 
      • Remembering the three trigonometry triangles
      • Write down 9 equations from the three trigonometry triangles
        • Using compound measure triangles to create equations
    • Solving the equation
      • Substituting values in to a formula
        • Using algebra as a variable
      • Solving one-step equations involving inverse trig functions
        • Applying inverse functions to a fraction
        • Using algebra as an unknown
      • Using the trig and inverse trig buttons on a calculator
    • Combining the above steps in a clear routine

    Now let's look at how this affects each of the advantages above.
    1. Imagine the cognitive load of weaker students trying to process all that at the same time!
    2. Students may have a misconception about any one of these components. This misconception may only occur for certain types of questions and it may not be visibly shown in their working. This makes it very difficult to diagnose mistakes. However, if you are only teaching how to "Write down 9 equations from the three trigonometry triangles", you minimise the number of different misconceptions students can have (either they get the order wrong or they mess up the sin(angle) part).
    3. In the past, I may have scaffolded trig for my students by looking at an easy subset of the problems (e.g. only sin, only finding hypotenuse). This can easily lead to students learning cognitive shortcuts that do not work for all questions. Another common difficulty with trig is the relative nature of opposite and adjacent sides (the fact that these switch when seen from the perspective of different angles). However, if you teach "Labelling the sides of triangles as opp, adj, hyp" as a separate skill, you can explicitly show all variations of this and students can practice and be assessed on it in depth in a matter of minutes.
    4. Before, I have despaired at the thought of teaching trig to a lower ability class! In the past I might have tried whilst only expecting 50-60% of students to succeed (cementing students' self-images of low intelligence) or skipped the topic altogether. However, atomisation gives me a route map to build up their knowledge whilst ensuring the success of >95% of the class on each component.
    5. I now have a much more detailed idea of how difficult the topic will be for students and the potential pitfalls they may have. Combined with my knowledge of the class, I can decide for each component whether they need to be assessed, recapped with review activities/homework or completely retaught/taught from scratch.
    6. Stipulation, or the learning of misrules, can be very difficult to remedy once embedded in to their practice. As mentioned in point 2, atomisation helps to spot and correct these misunderstandings during initial instruction.
    7. Teaching trig is complex. To explain it takes at least 5 minutes, even without students' questions and other interruptions. Getting 5 minutes of undivided attention from some classes is a big ask. However, all of the components listed can be explained in under 1 minute. I have found that students are much more willing to give you their attention when you ask for it in short, efficient bursts like this.

    Unanswered questions:

    Here are a few reflections I have had about atomisation that I still do not have an answer to:
    • Is it ok to combine components sometimes in order to speed up the teaching of a topic? 
    • When is it ok to combine components? 
    • With which types of components is it ok to combine them?
    • How different would this look with different classes?

    Other practicalities:

    It is important to show the full range of possible questions that can be asked of any particular atom to avoid students learning cognitive shortcuts. These shortcuts can cause serious problems if embedded in their learning as they can be very difficult to unlearn.

    If you cannot teach the full range of possible questions in a single session, you should still show the full range, with students marking off the questions that "we don't know how to do yet".

    Friday, 19 May 2017

    Exploring the difference between averages

    Two tasks designed to get pupils thinking about the different averages and how they are affected by new numbers added to a set. It preempts this lesson on which average you should use and why. Its also quite a nice bit of cross-curricular thinking.

    Task 1 - Averages and probability (editable files here)


    Task 2 - Match the averages to the description


    Monday, 15 May 2017

    Folding Fractions

    Skills Practiced:
    • Spatial reasoning
    • Fractions of shapes
    • Multiplication of Fractions
    • (Potentially) Pythagoras


    Material:
    • Paper cut in to squares
    • Display Board

    Instructions
    • Each student gets a square piece of paper.
    • Ask if anyone can fold the square into a shape that is 1/4 of the original size. Ask them to explain how they know that it is exactly 1/4.
    • Project the fractions on the picture below on to the board.

    • Students aim to make those fractions from the original square.
    • Every time they get an answer, they must convince their partner that it is correct before they put their name on it and blue-tack it to the board. Multiple different answers are allowed for each fraction
    • Below this (or on another board(, students put up any other fractions they can find.
    Example work


    Extensions and Variations:

    Quick wins from Direct Instruction: Dimensions of Difficulty

    This post was inspired by an episode of the Craig Barton podcast with Kris Boulton. Kris was acting as a salesman for Engelmann's Direct...